Showing posts with label Crochet Basics. Show all posts

Thursday, February 10

That Tricky Half Double Crochet Stitch (hdc)

The Half Double crochet stitch (HDC) is known as the Half Treble in the UK and Australia. 
Do you love this stitch too? These four designs make good use of it:
L to R: Orbit Cowl, Half Double Handbag, Bling Bam Bangle for beginners, and Pallas.
Come to think of it, so does the Buffalo Knot Belt!


2018 Update: New crocheters learn how to do the HDC stitch very early on, so it's really only a little bit tricky—in potentially two ways. The original blog post below is about identifying the true last stitch of an HDC row. Before you read it, check that you're doing the correct yarn over for it each time. You do a total of three yarn overs before you've completed each HDC. Some folks mix the yarn overs with "yarn unders".
Now, back to the show.
-:------------:-

The last HDC of a row can fool an unsuspecting crocheter.
When this happens, the stitch count of a row is accidentally increased or decreased, and uneven edges result.

Here are four photos of HDC stitches. In the first one, how many more HDC do I need to complete the row?
a) Two
b) Three
c) Four

If you said two, you've been tricked by the last HDC stitch into thinking that it is the turning chain-2 that began that row. You would accidentally decrease a stitch. If you answered four, you're perceiving the turning chain-2 as being another HDC, and you would accidentally increase a stitch. We don't crochet into the turning chains of HDC rows (though there are occasional exceptions to this rule, and it will be explicitly stated in patterns). If you answered three, you're correct.


In the second photo I've completed all but the last remaining HDC of the same row as in the first photo. To make it more obvious where the last stitch will go, I poked the crochet hook into the space. Can you see the hole that remains from where the hook entered it? (compared to no hole in the first photo.) Anything after that hole is the turning chain-2, and we just ignore it.

Before I explain photos 3 & 4, I have a suggestion that might help. After all, no one will be looking over your shoulder and poking a crochet hook into the last real HDC so that you can tell for sure which is the last stitch.

The guideline I use for identifying the last HDC of a row is: the top two loops of the HDC are not found directly above the rest of the stitch. Instead,
  • If you're crocheting in rows and turning to begin each new row, you're looking at the back of each hdc, and its two top loops are found just after the rest of the stitch.
  • If you're not turning to begin each new row (such as when working in rounds), you're looking at the front of each hdc, and its two top loops are found just before the rest of the stitch.
Photos 3 & 4 illustrate another tip that might help some crocheters. They are nearly identical to the first two photos. The third photo shows 3 HDC remaining. The fourth photo shows the last HDC after I've poked the crochet hook under the top two loops of it, so that you can see where I'm about to place my last HDC.

The only difference between the second pair of photos and the first pair is the direction I turned my work to begin a new row after chaining 2. I'm crocheting right-handed, and in the first pair of photos I turned my work counterclockwise [a.k.a. anticlockwise] each time I began a new row. In the third and fourth photos, I turned my work clockwise each time I began a new row. (Someone crocheting left-handed would do the opposite.)

Controlling the way the turning chain-2 looks to you as you near the end of the row might help prevent you from being tricked into accidentally increasing or decreasing. To me, in the third photo I'm less likely to think the chain-2 is an HDC. Whereas, in the first photo, I'm tempted to wonder if I should crochet into the top two loops of the chain-2.

Happy crocheting, I hope this helps someone!
Here are two more ways the HDC is the star of the design: Mamruana and Rosebud Argyle.
Thursday, December 16

Tunisian Crochet Basics: How to End a Forward Pass

I use this abbreviation in my Tunisian crochet patterns: endTss. It stands for "ending Tunisian simple stitch." If you are crocheting right-handed, this would be the stitch found along the left edge (and this is reversed if you're left handed).

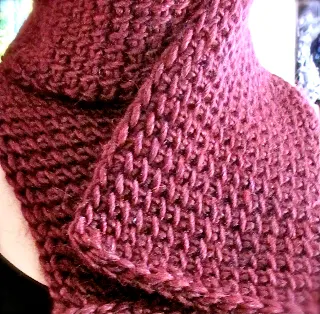
"Burly" Men's Scarf in Tunisian Simple Stitch
In pattern-writing language endTss is one of several ways to say, "Work the last stitch of each forward pass the usual standard recommended way."

This left edge stitch has a front vertical bar, like the other Tunisian stitches of each row. It also has a few other vertical strands associated with that same stitch. In fact, it has a total of three vertical strands. Why? Because the last Tss of the row is always a chain stitch, and a chain stitch has three strands in it. (Watch how the last stitch is created next time you crochet it and then begin the Return Pass.)

Some crocheters insert the hook under just the one front vertical bar, same as for the rest of the stitches of the row; however, "endTss" means do not do that. Instead, insert the hook under the front vertical bar and one other nearest vertical strand of the stitch. The outermost one is the easiest.

Doing this, instead of picking up only one strand, will give the edge a more finished chained look. This two-strand chained effect is preferable because:
  1. It matches the other 3 edges better (especially if you began your project by working into the bottom third loop of the foundation chains).
  2. It has a bit more heft, so it helps stabilize and even out the edge more than a lone strand would (it is "self-finishing").
  3. If you will be crocheting a border along the edge, it's a better and more pleasant edge to work stitches into.
I'm not aware of it preventing curling though :-)

See the two-strand chained edge of this Burly Scarf?

Wednesday, September 1

Plying and Spinning Cotton Crochet Thread

2018 Update: For issue #91 of my crochet newsletter I distilled a lot of my thinking, experiences, and other information about the twist of yarn. Twist—the amount of it and the direction of it—is one of the things that makes crochet thread feel and behave so differently from yarn. Even from lace weight yarn.

An image from Issue 91: Crocheting a Yarn's Twist Energy


-:--------------:-

[from 2010] I'm collecting here the notes I've written on this over the years and will eventually polish it up into a real post. For now, it serves as a place to help crocheters choose the best yarns or threads for my crochet patterns. It's also a way to appreciate the key differences between what we call "yarn" vs "thread."

Cotton crochet thread of the same thickness as a yarn is often fundamentally different in its behavior when crocheted. One big reason (among others) for this is its direction of twist. Most crochet thread is "z-twisted" while most yarns are "s-twisted." (There aren't many exceptions!)

I find that this factor makes the biggest difference for most crochet jewelry I design, and when I'm using very tall stitches because of all the yarn overs. Yarn overs either add to a yarn's twist, or subtract from it (i.e. unwind it).

I try to use triple trebles with z-twisted yarns because an s-twisted yarn, if it's not tightly plied, will come untwisted from all the yarn-overs and is unpleasant to work with and look at. Splitty yarn can really slow down working off so many loops with each stitch, and I want the stitches to end up looking good enough to be worth the effort, instead of stringy or unbalanced. (I think this matters more for right handed crocheters than left handed because of the kind of working twist we add/subtract, not sure.)

Tuesday, August 10

Cotton Crochet Thread Sizes & Equivalents

Here's how I explain the thread weights in my crochet jewelry patterns, in order of thick thread to thin, with US, UK and AUS terms:
Irish Pearl Cords L to R: Size #5 Lanaknits Hemp,
Size #10 Cebelia, and Size #20 Opera threads.

Size #3 crochet thread is fairly equivalent in thickness to CYCA #2 Fine or US "sport weight" yarns {UK Light DK, AUS 5 Ply}; however, yarns don't necessarily behave like a cotton crochet thread of the same thickness. Jewelry patterns often require crochet thread because of its smooth, finely twisted and plied mercerized cotton, usually “z-twisted.”

Size #5 crochet thread is fairly equivalent in thickness to CYCA #1 Super Fine or US "fingering weight' yarn {UK & AUS 3 Ply or 4 Ply}; however, not all yarns behave like a cotton crochet thread of the same thickness, so substitutions may not work well. Six-strand cotton embroidery floss falls in this size range when crocheted with all 6 strands together.

Size #10 crochet thread: some thread crocheters call this popular size “bedspread weight.”  It's lumped together with thinner thread sizes in the yarn industry’s catch-all “lace weight” category: CYCA #0 Lace weight yarn {UK & AUS ??}; and most lace weight yarns don’t behave like a cotton crochet thread of the same thickness. Most of my thread crochet jewelry is designed for use with smooth, finely twisted and plied mercerized cotton, preferably “z-twisted” (i.e. has a counterclockwise twist).

Dichroic Pendant Cords (pattern is adjusted for different thread weights)
Size #20 crochet thread: As with Size #10 & #30 crochet threads, equivalent yarn weight names are not helpful with these extra fine threads. For the best looking and lasting crochet jewelry, use a “6-cord” thread, sometimes called "cordonnet." It has recently become easier to find in more colors than the traditional white and ecru.

Size #30 crochet thread: As with Size #10 & #20 threads, equivalent yarn weight names are not helpful with these extra fine threads. For the best looking and lasting crochet jewelry, use a “6-cord” thread, although it's difficult to find it in modern colors.

Palmetto Cuffs crocheted of yarns spanning the light sport to
aran (heavy worsted) weight categories.
The yarn of the smallest cuff is equivalent to the thickest thread size #3!

Saturday, July 17

Crochet Picots You Can Love

Cute picots border every edge
of the Liebling Shrug.
A picot is a decorative little bump of crochet stitches that adds just the right touch to many kinds of crochet projects, often as a finished edge. It's smaller than a bobble, puff, or cluster; ideally it's a cozy little knot that's "cute as a button."

Check out the cute bowtie picots along this shoulder seam!

I've heard many crocheters say that they don't like the look of their picots. After crocheting for 30 years or so, I can say that no matter how many picots one has under one's belt, the next one may look mediocre for a number of reasons that are easy to fix

Rosepuff Shawlette's bead-picot edge
The first thing I do is try my favorite way to make them, below. It comes the closest to producing a fail-safe picot, with the added bonus of being the fastest and smoothest stitching motion for me (keeps the picots from feeling like "speed bumps" LOL). 

Vashti's Favorite Way to Crochet Picots

I used this method for the Liebling Shrug and the flounced Antoinette, Emdash, and Cantina scarves. In fact, I talked about this picot method in this blog post about the picot lace sleeves of the Baroque Tabard.
Insert the hook from the top down into two front loops of the "host" stitch (the last stitch made before chaining 3 or 4 to start the picot). This "host" stitch can be any stitch except a slip stitch; a vertical "bar" or "leg" of the stitch is needed to comfortably and swiftly work into. 
The 1,380 Cashmere Picots Scarf.
(The edge is a mix of picots & petals.)
It's so easy to do it, but the words can make it sound difficult. 

Depending on the look (which sometimes has to do with the yarn, or my hook size), I might close with a single crochet (sc) worked into these two loops, OR a slip stitch (sl st). Either way, I love how it stabilizes a picot with a stronger base, and it's is easier to make quickly. Closing with a sc instead of sl st can add more bulk if the picots seem puny. 

When I've chosen *against* this method, such as for the 1,380 Cashmere Picots Scarf, it can be because the picot comes out looking blockish sometimes. Also sort of flat or less of a pearly 3-D knot. Each case is different.
Picot foundation for the
1,380 Cashmere Picots Scarf.

I always try out a range of ways to make picots no matter what the pattern or stitch dictionary says.

For example:

  • Chain 4 instead of 3 (most people chain 3)
  • Heck, try chaining 2 and then close with a sc (usually makes a little molehill)
  • Chain tightly. Or, loosely.
  • Close it with a sc if you tried a sl st.
  • If you work into the first chain of the picot chains, try working into different loops of that chain.
  • I used a subtle type of picot for Lotus Chip Charms.
  • Invent-A-Picot: I wonder what happens if you chain 1 then do a 2-hdc puff in the top of the stitch just before the chain-1?
I hope each crocheter explores alternate ways to make picots so that each of us always gets the kind that we want!

Sunday, March 21

What's "Hook-Led Gauge"? Why is it Important?

Use extra-fine lace weight alpaca yarn and
a big Tunisian crochet hook. for the
Convertible Smokestack Vest
2018 Update: I revised this post and created a permanent page for it at my new website.

Learning how to let your crochet hook determine your stitch gauge is possibly the most valuable skill a crocheter could develop.


Why?

A hook-led gauge is necessary for making fashionable-looking crochet fabrics with dramatic drape and textures. Sometimes I think of it as "crocheting with air" -- that's how it might feel to use a very big crochet hook with a fine or very stretchy yarn.
    It comes in handy when making Love Knots and other intermediate-level stitches that depend on being able to "eyeball" a loop size.
      You'll be ahead of the curve if you'd like to someday crochet professionally as a teacher, designer or as a valuable pattern tester for other designers!

      Weightless Tunisian Wrap
      It breaks a habit that many crocheters develop: they make their chains and slip stitches tighter than their other stitches, regardless of their hook size. 
      The Eva Slip Stitch Shrug

      Sometimes the crocheter simply crochets much more tightly or loosely no matter what size hook they're using. Other crocheters are actually using the yarn as a gauge guide. Crocheters who are used to using a lot of cotton yarn or thread, which is not stretchy to work with, tend to do this.
      Every crocheter starts out with a natural gauge, often called the "crocheter's hand." With enough practice, crocheters can have more control over their natural stitch gauge. This is actually an intermediate skill that leads to advanced crocheting, although it's not listed in any of the standard skill level descriptions.

      To maintain the best stitch gauge throughout, use the diameter of your hook to judge if your stitches are the right size: as you crochet, the space between the two top loops of each stitch should look large enough to fit the size of the crochet hook you're using. 
      The stretchy slip stitch Pullover Shrug

      See issue #59 of Crochet Inspirations Newsletter about it: http://us2.campaign-archive2.com/home/?u=8d9b0b0df0b73f0fdcb7f4729&id=9c8df8dd87
      Starwirbel Cowl. See newsletter 
      issue #60 for more.
      You might feel a bit outside of your comfort zone at first. If so, just tell yourself that you're making an important investment in your hobby: a world of exciting new stitches and designs will open up to you.

      Saturday, February 27

      Two Kinds of Crochet Slip Knots

      2018 Update: I've revised and expanded this post at my new website. I recommend these posts!
      Start Crocheting From Scratch
      More Ways to Start Crocheting
      Starting Knot Variations
      How To Do a Slip Knot Variation

      -:-------------------------------:-

      I knew of only one kind of slip knot when I learned how to crochet at the age of nine. Many years passed before I learned that there are actually two versions of it from a crocheter's point of view. I call one adjustable (blue one in photo) and the other, locking or secure (the red one). The only difference is which yarn end you use to make it.

      It used to be that all of my slip knots were adjustable by accident, now they are all secure on purpose! Video links are at the end of this entry.

      Which Kind Do You Make?

      Tug on the short end of the yarn (a.k.a. the cut end or "tail").

      • If doing this tightens the loop, you made an adjustable slip knot
      • If you tug on the long or "ball end" (i.e. where the yarn that is attached to the skein) to tighten the loop, it is a locking slip knot.

      The locking version is important because there's no chance of it coming undone under stress, such as when it is part of a purse bottom, or the clasp end of heavy beaded jewelry, or the center of afghan motifs.

      The adjustable version is useful for closing up a center hole in one of the many methods of crocheting in the round: If you work all stitches of the first round into one chain, you can then pull on the yarn tail to close up the center hole tightly. Be sure to leave a long enough end (more than four inches/10 cm) for weaving in securely so that it won't loosen later.

      If your adjustable slip knots have never loosened, perhaps you have woven in a nice long yarn end to secure it; or used a non-slippery yarn, or a tight stitch gauge.

      Slip Knot Video

      This video demonstration (not mine) shows three ways to make a slip knot. The first two are just different ways to make an adjustable slip knot. Notice how she uses the short yarn end when completing the slip knot, and then tightens the loop around the hook by pulling the short end.

      The third slip knot in the same video is the locking slip knot. Notice she uses the ball end (long yarn end) when completing the slip knot.